Kay Burn Lim: Preview of Nauticam LT housing for RED Weapon
Finally took the camera to the pool for a test. (I really have to name her) and thought I might list some of my impressions for those interested in going down this route. Consider this a “mini preliminary review”.
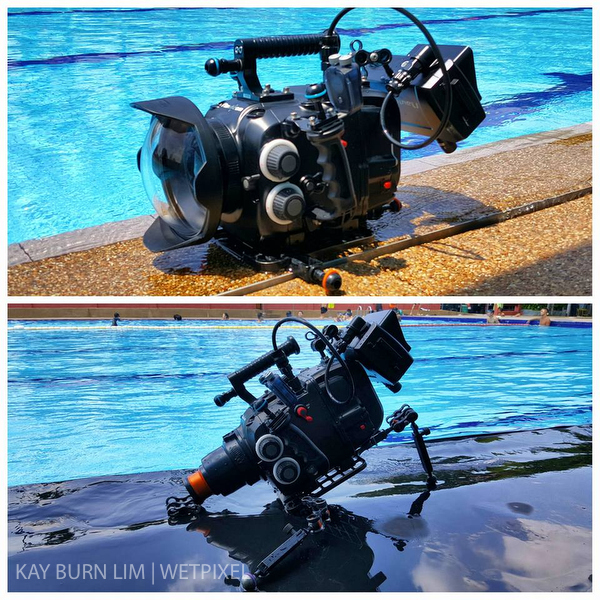
First of all, this fella is heavy. Probably lightest in its class but it still comes in at 13.5kgs on land with a Tokina 10-17mm fisheye lens, dome, dual V lock batteries and a SmallHD 502 monitor setup. The camera inside is currently a RED Raven, the lightest of the REDs. However the Weapon LT housing will accept every RED DSMC2 model camera, including the Scarlet-W and all the Weapon models.
I’m very pleased with the current configuration. While some may prefer to have the monitor up top and clamped in front of the handle, I needed/wanted a more streamlined setup for some cage dives and also for freediving. The monitor isn’t too close to my face at this point. However when the long sightedness eventually comes to haunt me, I might have to move it further away.
Wide Angle Setup
In the wide configuration, set up this way, the unit is slightly negative, dropping at a (relatively) slow rate if you let it go. I prefer a slightly negative setup when filming as opposed to a neutral setup when shooting stills. Balance is great and the camera only tips ever so slightly upwards, but not in a way that would hurt your wrists. I attribute that to the excellent 180 dome from Nauticam. This piece of glass is cut from a much larger dome and has a less pronounced curvature. With the smaller sensor size of the Raven, corners are great with my lens choices even though the dome is relatively small. I can use the Sigma 8-16 and Canon 10-22 with the same dome as well. With the dome being smaller and trapping less air, the upward tilt in handling is very modest, even with two heavy batteries at the back and a monitor mounted at the rear. I might add some Stix floats to the back to further balance the camera later.
Macro
For the macro setup, I only tested the Canon 100mm L lens. The setup is slightly more negative but I would still probably add a weight pouch to the tray. Will need more dives to determine if it’s really needed. I’m really pleased that the Nauticam Shogun tray could be configured for use with this setup (flipped upside down). It places the ball joints for the tripod legs much further apart for more stability. A much better option than placing the balls on the camera itself (there are 4 holes on the housing to screw ball joints in). Being a cinema camera, the port sits higher than it does on most DSLR housings. Getting low might be more difficult and I would need to choose my angles carefully when shooting. The housing handles beautifully though and focusing is a breeze.
Camera controls
RED cameras operates via a touch screen monitor on land. To work with these cameras underwater. You will need to add a RED DSMC2 Sidekick control plate. This gives you physical buttons, a jog dial and more programmable shortcut buttons. There are also buttons on the other side of the camera where the media card slots in. To access aperture, shutter, ISO, frame rate controls, one needs to choose the function on the monitor, then adjust the value via the jog dial before selecting. A real pain if you come from the DSLR world.
Fortunately, the mappable buttons solve a lot of these issues. I currently have the lever on the left of the housing to select power save/standby when lifted up and playback/rec toggle when flipped down. On the right, I have 4 buttons which I can map that are set to ISO up/down, custom white balance and shutter speed down . It took me a while to decide on this configuration. I finally came to the conclusion that struggling with enough light was one of the constantly changing conditions while filming underwater, these would be the most important controls needed. I wish there were more direct access controls though.
Monitor
The SmallHD 502 monitor is fantastic! Bright and incredibly simple to use. Sensors built into the monitor automatically flip the image when the monitor is used upside down. The fact that it isn’t a touch screen monitor makes adapting it to a housing very simple. It has easy to use peaking and focusing aids. I don’t even need to access the camera for this. I simply use the buttons on the monitor housing for peaking controls, magnify, exposure check or zebra. SDi connections are very welcome too, far better and more reliable than HDMI. I only wish it were bigger as I’m used to the (comparatively) massive screen of the Atomos Shogun. While I could use my Shogun housing with the Weapon LT housing, I feel that the bulk doesn’t justify things with the already large housing. I may however consider using it for some supermacro shoots.
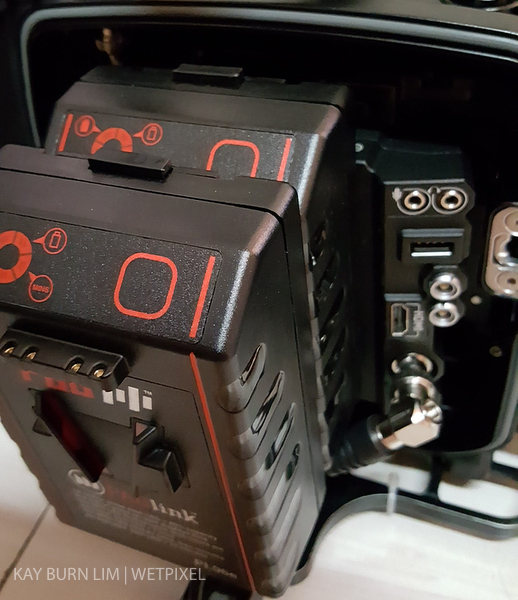
The housing also has lots of bulkheads. With one for the monitor (and another in use for the vacuum valve), there are still two others that I could put to use. I plan to add a hydrophone to one to record whale sounds or dolphin clicks when I go next.
Cons? Not many. There are few housing brands in the market that cater to these cameras. However, I must say that the finishing, ergonomics and engineering that goes into these Nauticam housings are hard to beat. Their vacuum system is the best out there and really gives me the confidence needed to safely bring down an expensive camera for a job without worrying about a flood. Lens swaps are easily done from the port opening itself although you still need to remove the rear cover to toggle the vacuum switch again before sealing.
If I had one gripe, it would be that both my Weapon LT and the new 502 monitor housing came with the old model vacuum release valve instead of the much better push button model that’s the standard now.
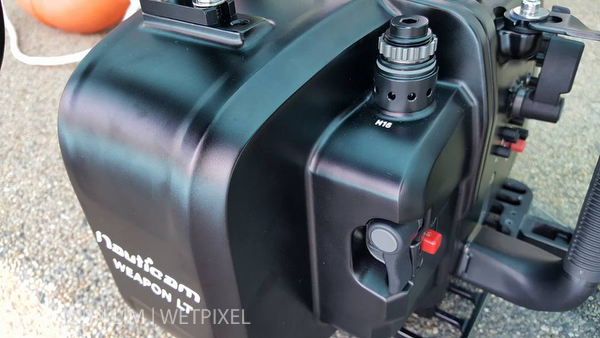
I would have assumed that the latest top tier housing from Nauticam would have them as a standard feature. Not important when it comes down to functionality though.
I hope this review is of use to anyone looking to go down this route. As a side note, if you ever decide to go test dive at the Seamonkey Dive Center pool in PJ, Malaysia, bring a buddy. They wouldn’t let me rent a tank without one. Kudos to strict safety standards though. This review and testing was done entirely on breath hold and without a snorkel.