Adobe guide to Optimizing Lightroom Performance
Adobe has published a detailed guide outlining tips and settings that can help Lightroom run smoother and faster. It explains how to optimize hardware and system, which settings provide optimal performance and how to perform regular system maintenance.
Optimize performance
Want to improve Photoshop Lightroom performance? Try some of these suggestions.
For the best results, take a holistic approach. Read all the suggestions here. Consider which ones to implement within the context of your computer setup. Also consider the types of files you use and your particular workflow. Each circumstance is unique and requires a different combination of techniques to achieve the most efficient performance from Lightroom.
Optimize your hardware and OS
Update to the most recent version of Lightroom. In Lightroom, choose Help > Check For Updates.
Exceed minimum system requirements
The minimum system requirements to run Lightroom are just that: the minimum you need for Lightroom to operate. Additional RAM and a faster processor, in particular, can yield significant performance benefits. The requirements vary depending on the following:
- The types of files you work with
- Their sizes
- The total number of images in the catalog
- The extent of spot healing or local (brushed) adjustments applied to images.
Options that can help increase performance include:
- 64-bit, multiple-core processor (for best performance, up to six cores; the extra power is especially important if you use multiple or high-resolution monitors, which require more power)
- At least 4 GB of RAM, more if you use Photoshop at the same time
- Fast hard disks, especially for the catalog and previews
Find out the system requirements for your version of Lightroom.
To see the details of your particular system configuration, in Lightroom, choose Help > System Info.
Use a fast hard drive
For the simplest workflow, a fast (7200 rpm) internal Serial-ATA drive is sufficient. For more demanding workflows, consider a RAID array.
Storing catalogs, image files, and previews on an external drive is convenient if you work with the same catalog on multiple computers. Doing so, however, can negatively affect Lightroom performance. If you must store your files externally, make sure that you have a fast connection. For example, use a Thunderbolt connection, USB 3.0 (not USB 1.0 or 2.0), or eSATA connection.
Note: Catalog files cannot be stored on network drives.
Make sure that you have a large enough hard drive and enough free space
Working with too little free hard-disk space can cause poor performance. Make sure that the hard drive that stores your Lightroom catalog, previews, and image files is at least 20% free.
See Lightroom system requirements to find out the minimum amount of free hard-disk space you need for your version of Lightroom.
Update the graphics driver
Use a compatible graphics processor (also called a graphics card, video card, or GPU). See Lightroom graphics processor (GPU) troubleshooting & FAQ](https://helpx.adobe.com/lightroom/kb/lightroom-gpu-faq.html).
Be sure to keep the graphics driver software up to date. See Update the graphics driver | Windows XP and Update the graphics driver | Windows 8, 7, Vista. On Mac OS, click the Apple menu and choose Software Update.
Run Lightroom in 64-bit mode (Lightroom 4 and 3)
If you run Lightroom in 64-bit mode, it has access to more than 2 GB of RAM, which is the ceiling for 32-bit operating systems. Giving Lightroom access to more than 4 GB of RAM can significantly improve performance.
Lightroom operates in 64-bit mode automatically if it is installed on a computer that is 64 bit capable and running a 64-bit OS. You can verify that it’s running in 64-bit mode by doing the following:
- Verify that Lightroom is running in 64-bit mode on Windows
- Start Lightroom and look at the title bar of the application.
- See if “x64” appears in the title.
Verify that Lightroom is running in 64-bit mode on Mac OS
- In the Finder, navigate to the Applications folder and click Adobe Lightroom 3.
- Press Command+I.
- In the General options, make sure that Open in 32-bit mode is deselected.
Use optimal settings in Lightroom
Render 1:1 previews intentionally
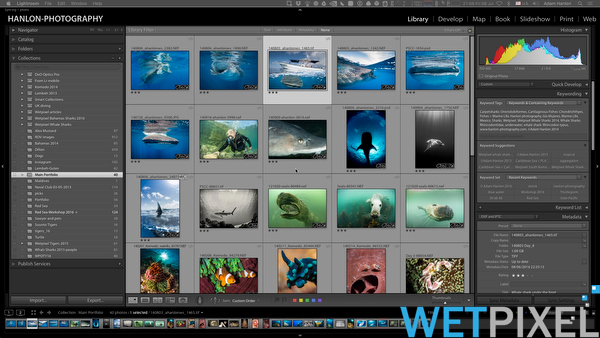
Lightroom uses previews to display photo thumbnails in the Grid view, the Loupe view, and in the Develop, Slideshow, Print, and Web modules.
When you import photos, you can choose from three types of previews of progressively higher quality:
- Minimal: These previews are the small, low-resolution JPEG previews embedded in the photos, which the camera generates. They are the fastest type of preview to create. The Filmstrip and Grid view of the Library module uses minimal previews temporarily, until Lightroom renders standard-size previews for those thumbnails.
- Embedded & Sidecar: These previews are larger, also camera-generated, and they take a little longer to create than minimal previews.
- Standard: Lightroom creates standard previews. They use the Camera Raw engine for processing. So, the sometimes appear different from minimal or embedded previews, especially if you have applied adjustments in the Develop module. You can specify the size of the Standard preview you need, based on the display you use. Standard previews are used in Filmstrip and Grid view thumbnails, as well as in preview and content areas of the Slideshow, Print, and Web modules.
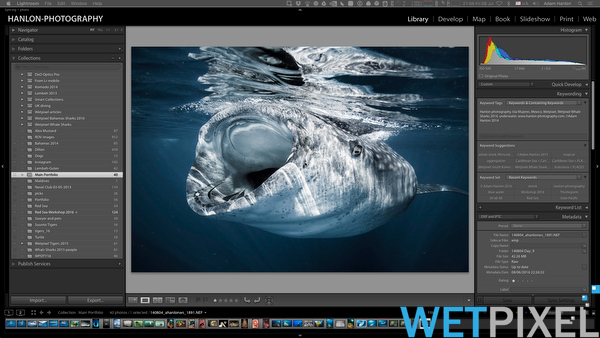
- 1:1: These previews are a 100% view of actual pixels and, like Standard previews, the Camera Raw engine processes them. When Lightroom generates 1:1 previews, it also generates minimal and standard previews, so all three are available to the program as needed. Because so much data is being processed, 1:1 previews can take a significant amount of time to create. Any time you zoom to 1:1 or higher in the Library module, Lightroom uses 1:1 previews.
To display and work with photos, Lightroom requires a standard or 1:1 preview, depending on the task. If, upon import, you only tell Lightroom to generate Minimal or Embedded previews, Lightroom creates Standard and 1:1 previews automatically as you’re working in the application. This process hinders performance. To increase your productivity and reduce this disruption, manage when and how you render your 1:1 previews. Render them on import, or set aside time to render them manually.
To render 1:1 previews on import, use the File Handling panel of the import window. Choose Render Previews > 1:1. Although generating high-quality, 1:1 previews on import slows the import process, it makes Lightroom more responsive when you start to work in the Library module.
An alternative, if you want a speedier import process, is to render minimal or standard previews on import. Then, at any time, select multiple photos in the Grid view of the Library module and choose Library > Previews > Render 1:1 Previews. Let Lightroom process the images before you start to work on them.
Keep standard-size previews as small as possible
Because rendering standard previews takes time, don’t make Lightroom crunch harder than it has to. Keeping standard previews small also helps reduce the size of the preview file cache, which speeds performance and saves on hard disk space.
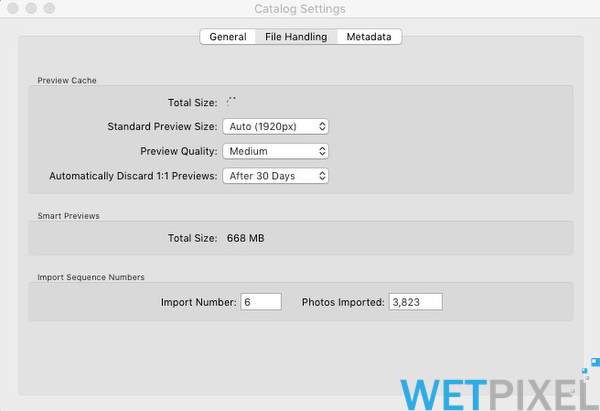
To make standard previews small, specify the appropriate the size and quality in the Catalog Settings dialog box:
- Choose Edit > Catalog Settings (Windows) or Lightroom > Catalog Settings (Mac OS), and then select File Handling.
- For Standard Preview Size, choose the amount that is closest to the longest edge of your screen resolution, but not shorter than it. For example, if your screen resolution is 1920 x 1200 pixels, choose Standard Preview Size > 2048 Pixels.
- For Preview Quality, choose Low or Medium, which equates to the low- or mid-range of the quality scale for JPEG files.
Note: The larger the monitor you use (and the higher resolution), the more work Lightroom does to calculate previews and update pixels when you make adjustments. If you experience performance slowdowns with large monitors, try reducing resolution of the display using the Display Control Panel (Windows) or Displays System Preferences (Mac OS).
Keep 1:1 previews as long as possible
Because 1:1 previews can quickly eat up disk space, Lightroom gives you the option of discarding them regularly—every day, week, or month. Every time you discard them, Lightroom has to re-create them the next time you need them—even if you’re just zooming in to Loupe view.
As long as disk space is not an issue, keep 1:1 previews as long as possible to optimize performance. In the File Handling area of the Catalog Settings dialog box, choose Automatically Discard 1:1 Previews > After 30 Days or Never.
Note, however, that the file that contains the previews, the [Catalog name] Previews.lrdata file can grow large if you have the option to delete previews set to Never or 30 days. This file is in the same the catalog file. If this option is set to Never, and you experience low hard disk issues, check the size of this file. Delete it if it’s too large.
Keep the catalog and preview cache in the same folder
By default, Lightroom keeps the preview cache file, [Catalog name] Previews.lrdata, in the same folder as the catalog file, [Catalog name].lrcat. If you move the catalog file or store it separately from the cache, then Lightroom has to regenerate the previews. So keep them together.
For the default location of the catalog, the preview, and other Lightroom files, see Preference file and other file locations.
Leave autowrite XMP turned off
By default, changes you make to files in Lightroom—adding keywords or fixing red eye, for example—are stored with the photo in the Lightroom catalog. However, for other applications, such as Adobe Bridge and Camera Raw, to recognize those edits, they are saved as XMP (extensible metadata platform) data. This data accompanies the image file.
In Lightroom, edits can be saved to XMP automatically or manually. If you regularly switch between Lightroom, Adobe Bridge, and Camera Raw, it’s most convenient to save changes to XMP automatically. That way, you don’t have to think about it. The applications are always in sync, always reflect the current Lightroom edits, and you don’t see metadata mismatch icons or badges in Bridge or Lightroom.
Saving changes automatically, however, can significantly degrade Lightroom performance. If you don’t work with multiple applications, consider turning off the autowrite preference. Changes are still saved in the catalog, and when you print or export photos from Lightroom, the changes appear in the output.
To turn off autowrite XMP, do the following:
- Choose Edit > Catalog Settings (Windows) or Lightroom > Catalog Settings (Mac OS).
- Click the Metadata tab, deselect Automatically Write Changes Into XMP.
Even if autowrite XMP is turned off, you can manually save metadata changes to individual files at any time. For more information, see Metadata basics and actions.
Optimize the catalog
Lightroom is constantly writing changes to the catalog file (.lrcat). When performance slows, optimize the Lightroom catalog by choosing File > Optimize Catalog. Optimizing the catalog instructs Lightroom to examine the data structure of the catalog and make sure that it is succinct.
To further optimize performance and improve catalog stability, when you exit Lightroom, and back up the catalog, choose the options Test Integrity Before Backing Up and Optimize The Catalog After Backing Up. These processes take a little time but can help keep the catalog operating smoothly.
Increase the Camera Raw cache size
Every time you view or edit raw images in the Develop module, Lightroom generates up-to-date, high-quality previews. It uses the original image data as its foundation, and then updates the preview for any processing or adjustments that have been applied. The process is a little faster if the original image data is in the Camera Raw cache. Lightroom checks the cache for the original image data and can skip early stage processing if the image data is cached.
By default, Lightroom sets the Camera Raw cache to 1 GB. If you increase the cache size, it can store more image data, which in turn speeds the generation of previews of those images. Some Lightroom users find that increasing the Camera Raw cache to 20 GB or more can dramatically speed performance in the Develop module. To increase the Camera Raw cache size, do the following:
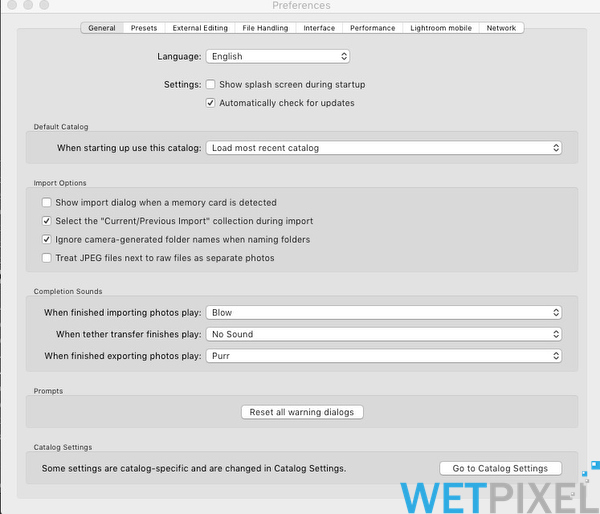
- Choose Lightroom > Preferences (Mac OS) or Edit > Preferences (Windows).
- Click the File Handling tab.
- In the Camera Raw Cache Settings area, experiment with a Maximum Size of 10.0 GB or more.
To further speed the cache, keep it on a fast hard disk. To specify the location of the Camera Raw cache, do the following:
- Choose Lightroom > Preferences (Mac OS) or Edit > Preferences (Windows).
- Click the File Handling tab.
- In the Camera Raw Cache Settings area, click Choose and navigate to the location where you want to store the cache.
Perform regular system maintenance
Keep Lightroom up to date
Updates fix bugs and can improve performance. Make sure you’re running the latest update of your version of Lightroom. Choose Help > Check For Updates.
Close unnecessary applications and startup items.
Other open applications and startup items decrease the amount of memory available to Lightroom. Quit unnecessary applications, startup items, and extensions and then make more memory available to Lightroom.
When working in Lightroom, also temporarily disable antivirus or security software that performs real-time scanning or automatic backup. For instructions on disabling antivirus or security software features, see the documentation for your antivirus or security software.
Run Disk Cleanup (Windows)
When you work in an application, Windows stores a temporary copy of your data file on the hard drive. Many applications create .tmp files and then delete them when you quit the application. Crashes or system errors, however, can prevent an application from deleting these files, causing them to take up disk space and create problems. From time to time, run Disk Cleanup to remove temporary files and any other files that are not being used.
- Do one of the following:
- Windows XP: Choose Start > Programs > Accessories > System Tools > Disk Cleanup.
- Windows Vista/7/8/10: Choose Start, type Disk Cleanup in the Search text box, and choose Disk Cleanup from the Programs list.
- Choose a drive to clean up, if appropriate.
- Select Temporary Files and any other files that you want to delete.
- Click OK.
Defragment the hard disk
As you add, delete, and move files on a hard disk, its available space is no longer a single, contiguous block. If the system does not have enough contiguous space, it saves fragments of files to different locations on the hard drive. It takes Lightroom longer to read or write a fragmented file than one saved to a contiguous location.
When defragmenting a hard disk, be sure to select options to fix drive errors and recover bad sectors. For instructions on defragmenting hard disks on Windows, see these Microsoft Help topics:
- (Windows Vista) Improve performance by defragmenting your hard disk
- (Windows 7) Improve performance by defragmenting your hard disk
- (Windows 8) Improve performance by optimizing your drive
Generally speaking, Mac OS hard disks don’t need defragmenting. Mac OS X defragments small files automatically. For more robust defragmentation or to troubleshoot hard disk problems on Mac OS, use Apple Disk Utility. Or, use a third-party utility such as Micromat Tech Tool Pro. See About disk optimization with Mac OS X on the Apple support website.
Install current OS updates
Updates to the Windows or Mac OS X operating system improve its performance and compatibility with applications.
Get Windows service packs and other updates from the Microsoft website. For assistance installing service packs and other updates, contact Microsoft technical support.
To get Mac OS X updates, choose Software Update from the Apple menu. For assistance installing updates, contact Apple technical support.
Alert: Before you install a system update, check the system requirements for the Adobe software to ensure compatibility. (Also check any third-party software or hardware you use with the Adobe software.) If the update isn’t listed, contact Adobe or the manufacturer of your third-party software or hardware.